How to Animate a Activity Diagram?
By animating an activity diagram, you can see the flow of actions in active.
- Select Modeling > Animation from the toolbar.
- In Activity Diagram Animation window, select a path and then click Play.
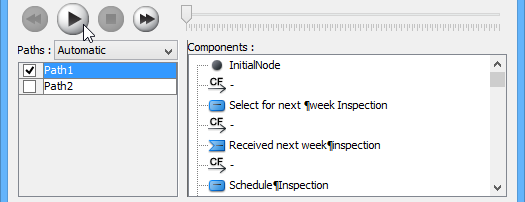
Clicking Play in Activity Diagram Animation window
NOTE: Animation can also be started by using any of the ways below:
- Right-click on the diagram background and select Utilities > Animation... from the popup menu.
- Click the drop-down menu of Modeling Tools and select Animation... on the toolbar.
Overview of Animation
The Activity Diagram Animation window will pop out after clicking Animation.... This window is where you can select an execution path to play an animation.
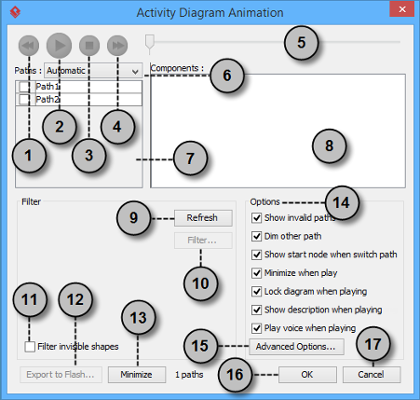 |
| Activity Diagram Animation window |
|
||||||||||||||||||||||||||||||||||||||||||||||||||||||
| Description of Activity Diagram Animation window |
Advanced Options
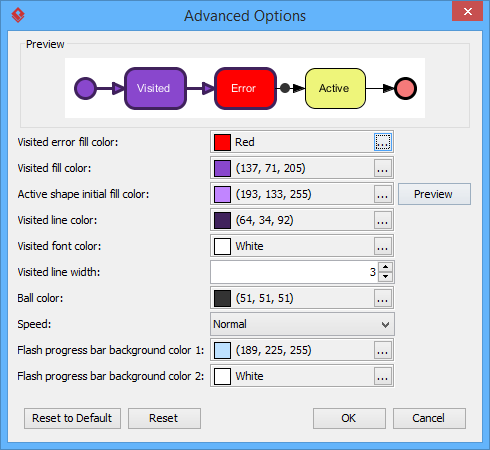 |
| Advanced Options window |
|
||||||||||||||||||||||
| The description of Advanced Options window |
Naming a Path
The Paths list displays all possible animation paths of your diagram. Each path represents a possible way to go through the diagram. By default, paths are named as Path1, Path2, and so forth. It is recommended to name to the path(s) for better clarification.
- To rename a path, move the mouse pointer on a path in the list and double click on it.
- Enter the name of path.
- Press Enter to confirm editing.
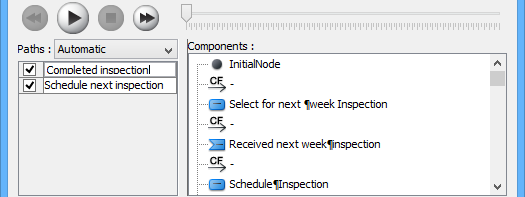
Naming the paths
Creating a Manual Path
In Activity Diagram Animation window, all paths are listed in Paths list by default. However, you can manage the flow of animation with your own choice. To create a manual path:
- Select Manual in Paths.
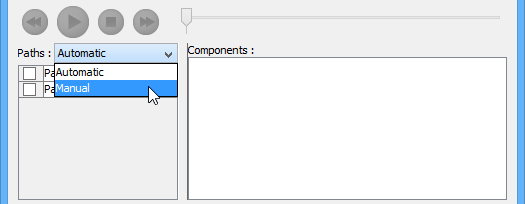
Selecting Manual in Paths - Press Add Path to insert a new path.
- Select the shapes that are shown on the Components list to direct the flow of animation.
- Click OK to confirm editing.
Handling Decision
You should choose an outgoing flow when there is more than one option in the flow. Different decisions will lead to different forks and make a different outcome for the flow of animation. Make either decision to view the outcome.
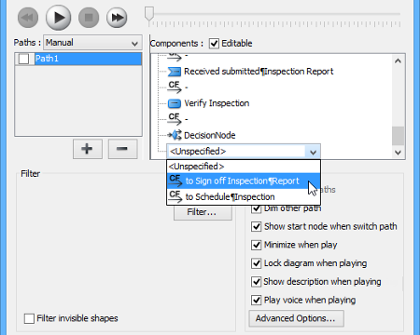 |
| Making a decision for the flow of path |
Reviewing an Animation
- When everything is ready, click Play to start the animation of the selected path.
- After click Play, Activity Diagram Animation window will be minimized to the bottom of your diagram with several buttons and a slider revealing on it.
Button Name Description 
Backward Move one shape backward in the flow. 
Pause Temporary stop playing the movie. Press Play to continue to play. 
Play Play or continue to play the animation. 
Forward Advance to the next shape in the flow. 
Stop Terminate the animation. 
Maximize Maximize Animation. Description of Animation bar - When the animation starts, a black ball will appear at beginning of path and traverse through the path until the end.
- When the black ball reaches a shape, the shape will turn into purple.
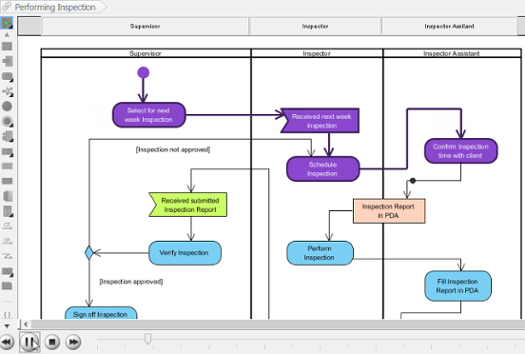
Reviewing the animation
Exporting an Animation
You can export the animation to Web contents so that you can play it externally in another computer just by playing in a Web browser.
- From the Paths list in the Animation window, select the execution paths to export as Flash movie.
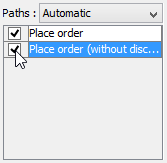
Path selection - Click the Export to Flash... button at bottom left. This shows the Export to Flash window. Here is a description of the Export to Flash window.
Here is a description of the Export to Flash window.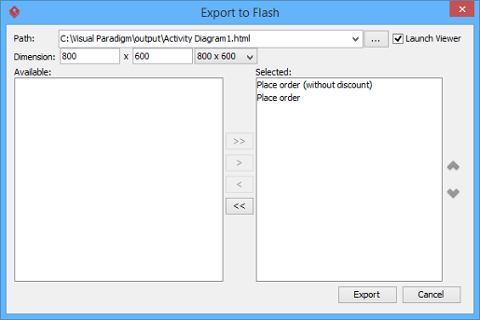
The Export to Flash window Part Description Path The path of the exported HTML file. Flash movie file (.swf) will also be exported to the same folder as the HTML file. Launch Viewer When checked, default web browser will automatically start and play the exported Flash movie. Dimension The width and height of viewing region of Flash. Available Available paths that can be selected to export to Flash movie for animation. Selected Selected paths to export to Flash movie for animation. Description of the Export to Flash window - An HTML web page will be exported. Specify the path of the HTML file. Note that the Flash movie files (.swf) will be exported to the same folder as the HTML file.
- Choose or enter the dimension of movie if necessary. Note that the dimension determins the size of viewable region instead of the size of diagram.
- Click Export. Open the HTML file in the web browser to play the movie. If there are more then one path being selected, you can click on the drop down menu at top right corner and select another path to play with.
Related Resources
The following resources may help you to learn more about the topic discussed in this page.
| 3. Animating sequence diagram | Table of Contents | Part XXI. IDE Integration |
