Creating shape in shape editor
Although UML and BPMN are well-established notations, sometimes they still not rich enough to express domain specific idea. Shape Editor is a diagramming tool for you to design your own notation (stencil). Notations created can be incorporated into diagrams in Visual Paradigm. To use shape Editor:
- To launch Shape Editor, select Window > Integration > Shape Editor... from the toolbar.
- When shape editor unfolds, you can create a shape by creating a gallery in advance. It is because a shape needs to be created under a stencil, while a stencil is put under a category of a gallery.
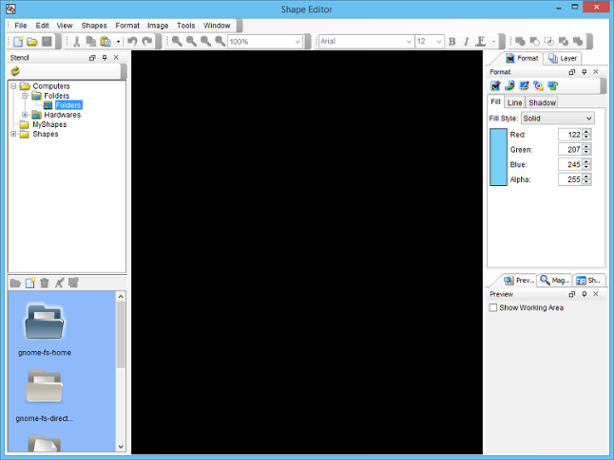
Shape Editor - A shape need to be created under a stencil, while a stencil is put under a category, under a gallery. To create a gallery, right click on the Stencil pane and select Add Gallery in the po-pup menu.
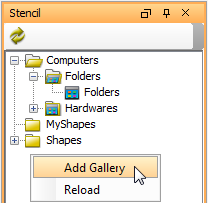
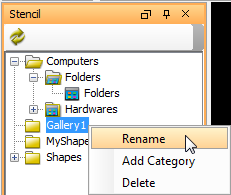
Add a gallery - To create a stencil, right click on a category and select Add Stencil from the pop-up menu. The newly created gallery is named as Gallery1 by default. If you want to rename it, right click on it and select Rename from the pop-up menu. Enter your preferred gallery name in the pop-up Input dialog box and press OK button to confirm.
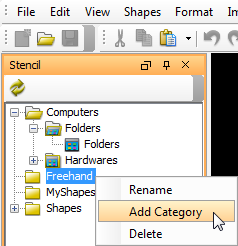
Naming a gallery - To create a category, right click on a gallery and select Add Category in the pop-up menu. Enter the category name in the pop-up Input dialog box and click OK button to confirm.
Add a category - To create a stencil, right-click on a category and select Add Stencil from the pop-up menu. The newly created stencil is named as Stencil 1 by default. If you want to rename it, right click on it and select Rename from the pop-up menu. Enter your preferred stencil name in the pop-up Input dialog box and press OK button to confirm.
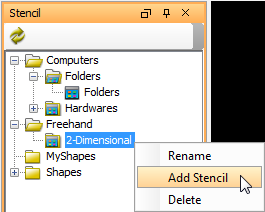
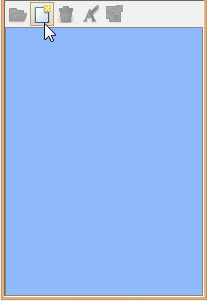
Add a stencil - To create a shape, click on the
 (New Shape) button in the bottom part of the Stencil pane to create a blank drawing for drawing the shape.
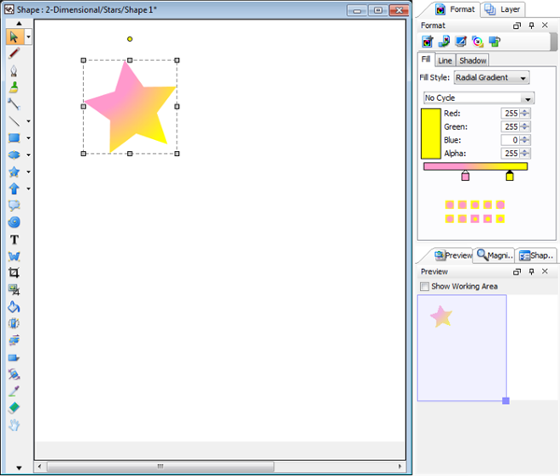
Add a shape - Create your preferred shape on the pane and you can also format its color in Fill tab of Format pane.
Draw a shape in drawing pane - To save the drawing by selecting File > Save from the main menu.
Shapes created in Shape Editor can be used in Visual Paradigm. For details, please refer to the next page.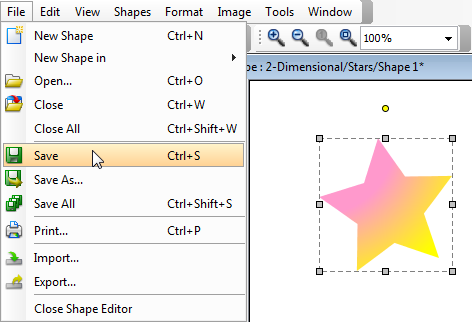
Save the drawing
Related Resources
The following resources may help you to learn more about the topic discussed in this page.
| Chapter 8. Using shape editor | Table of Contents | 2. Creating Shapes from Stencil Pane |
