Diagram specification window
You can customize the settings of each diagram you created in diagram specification window. Those settings include: general diagram information, grid setting, references, project management and comments. Diagram specification window is similar to model element specification window in which you can also enter general information, add/ remove references, enter project management and add/ remove comments.
Opening diagram specification window
To open diagram specification window of a diagram, right click on the background of the diagram and select Open Specification... from the pop-up menu. Alternatively, right click on the thumbnail of diagram in the Diagrams view of the Project Browser and select Open ${diagram-name} Specification... from the popup menu.
The overview of diagram specification window
 |
| Diagram specification |
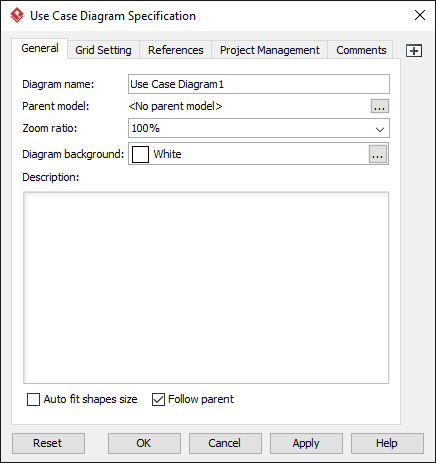
A diagram specification window consists of 5 tabs: General, Grid Setting, References, Project Management and Comments respectively. You may notice that an icon named Maximum located at the right hand side of window. We'll introduce it after giving you a brief on 5 tabs.
General tab
You can specify diagram name, select zoom ratio and diagram background color and enter description for the diagram. Furthermore, you can record voice description for the diagram. You can set all shapes including existing and future shapes to fit the size automatically.
Grid Setting tab
You can visualize the grid of diagram background by checking Grid visible. Moreover, you can set the size and select the color for the grid of diagram background.
References tab
You can add/ remove internal and external references for the diagram. Those references refer to file(s), folder(s), URL, diagram(s), shape(s), model element(s) and A³ resource(s).
Project Management tab
You can specify diagram process, priority, status, etc for project details.
Comments tab
You can add/ remove comment(s) for the diagram.
Maximize
Click ![]() to enlarge the specification window to the maximum screen size. Click it again to reduce it to the default size.
to enlarge the specification window to the maximum screen size. Click it again to reduce it to the default size.
Related Resources
The following resources may help you to learn more about the topic discussed in this page.
| 8. Spell Checking | Table of Contents | 10. Model element specification window |