Configure nickname
You can add a nickname under Modeling in the toolbar. By adding a nickname, you can start editing the names and descriptions of model elements under the new nickname.
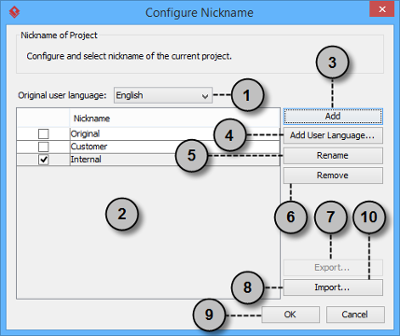
Overview of Configure Nickname window
 |
| An overview of Configure Nickname window |
|
|||||||||||||||||||||||||||||||||
| Description of Overview window |
Adding nickname
- Select Modeling > Nickname > Configure Nicknames... from the toolbar.
- The current working copy is by default in Original nickname, with English as user language. Click Add in the Configure Nickname window.
- In the Input dialog box, enter the name of the nickname set and click OK to confirm. Click OK to close the Configure Nickname window.

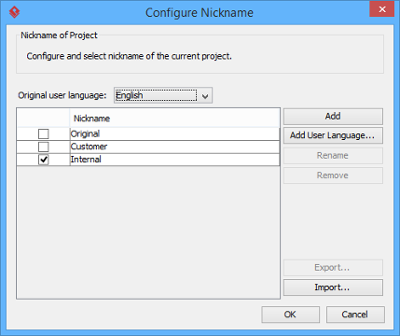
Two nicknames are added
Renaming nickname
- Select Modeling > Nickname > Configure Nicknames... from the toolbar.
- In the Configure Nickname window, select the nickname to rename. Click Rename.
NOTE: You are not allowed to rename the original nickname. - In the Input dialog box, enter the name of the nickname set and click OK to confirm. Click OK to close the Configure Nickname window.
Removing nickname
- Select Modeling > Nickname > Configure Nicknames... from the toolbar.
- In the Configure Nickname window, select the nickname to remove. Click Remove. Click Yes when you are asked for confirmation
NOTE: You are not allowed to remove the original nickname.
Specifying user language for the nickname
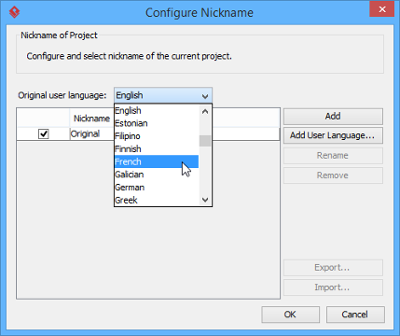
There must be an original nickname in every project, namely Original which represent the most standard version of language of project. You can specify the language for the original nickname, such as German. The language you have set affects the outcome of translation.
 |
| Select original user language |
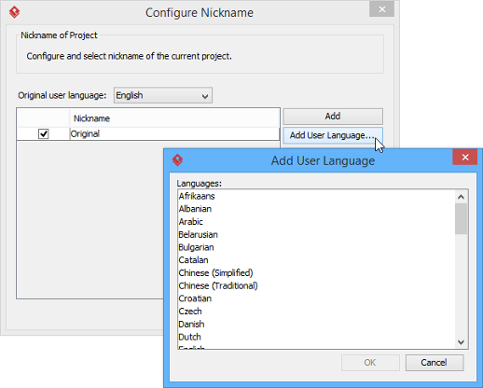
To add a nickname in specific language, click on the Add User Language... button and select a language.
 |
| Add a user language |
Related Resources
The following resources may help you to learn more about the topic discussed in this page.
| 1. What is nickname? | Table of Contents | 3. Using nickname |
