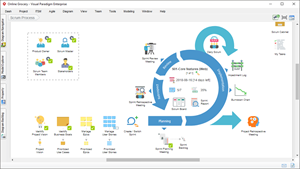
Textual Analysis is a useful technique that helps you discover useful model data from a given text, such as a problem statement, business case, use case description, domain descriptions, legacy model description, and even legacy code.
In this tutorial, you will learn how to identify classes from a problem description. After that, a class diagram and sequence diagram will be formed.
Problem Description
The following problem description will be used in this tutorial. Let’s take a look.
| Saturn Int. management wants to improve their security measures, both for their building and on site. They would like to prevent people who are not part of the company to use their car park.
Saturn Int. has decided to issue identity cards to all employees. Each card records the name, department and number of a company staff, and give them access to the company car park. Employees are asked to wear the cards while on the site.
There is a barrier and a card reader placed at the entrance to the car park. When a driver drives his car into the car park, he/she inserts his or her identity card into the card reader. The card reader then verify the card number to see if it is known to the system. If the number is recognized, the reader sends a signal to trigger the barrier to rise. The driver can then drive his/her car into the car park.
There is another barrier at the exit of the car park, which is automatically raised when a car wishes to leave the car park.
A sign at the entrance display “Full” when there are no spaces in the car park. It is only switched off when a car leaves.
There is another type of card for guests, which also permits access to the car park. The card records a number and the current date. Such cards may be sent out in advance, or collected from reception. All guest cards must be returned to reception when the visitor leaves Saturn Int. |
Identifying classes from text
Creating Textual Analysis
- Create a new project. Select Project > New from the main menu. In the New Project window, name the project Tutorial and click Create Blank Project to confirm.
- Create a new Textual Analysis. Select Diagram > New from the main menu.
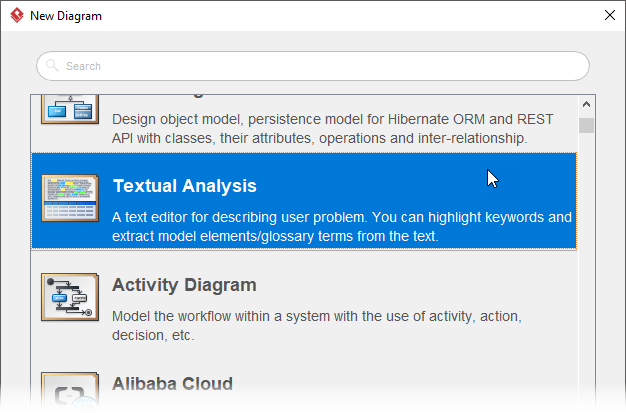
- In the New Diagram window, select Textual Analysis and click Next. Enter Security Improvement as the diagram name and click OK.
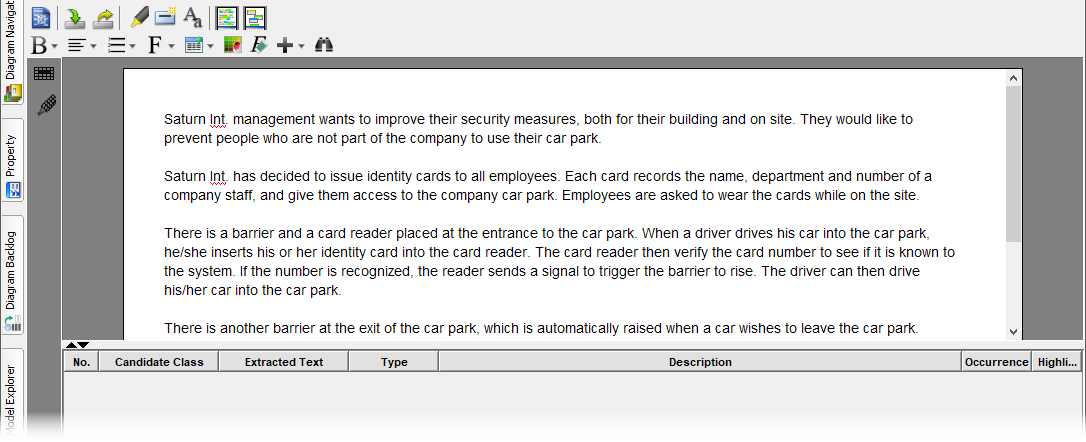
- This opens the Textual Analysis editor. Copy the problem description provided above and paste it into the editor. Pasting can be done by pressing Ctrl-V or right-clicking on the editor and selecting Paste.
Identifying candidate objects from text
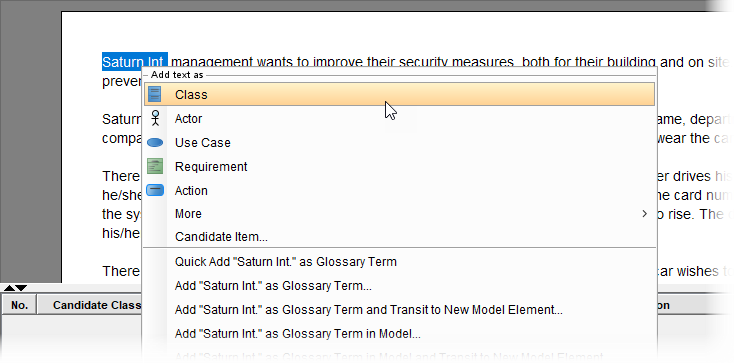
Read through the problem description to identify the candidate classes. When a candidate is found, right click on the segment of text and select Add text as Class from the popup menu.
A list of candidate class is obtained below:
| Saturn Int. |
security measures |
building |
site |
| People who are not part of the company |
Car park |
Identity cards |
employees |
| name |
department |
number |
Company staff |
| Access |
barrier |
Card reader |
driver |
| Card number |
system |
signal |
exit |
| Another type of card for guests |
reception |
Guest cards |
visitor |
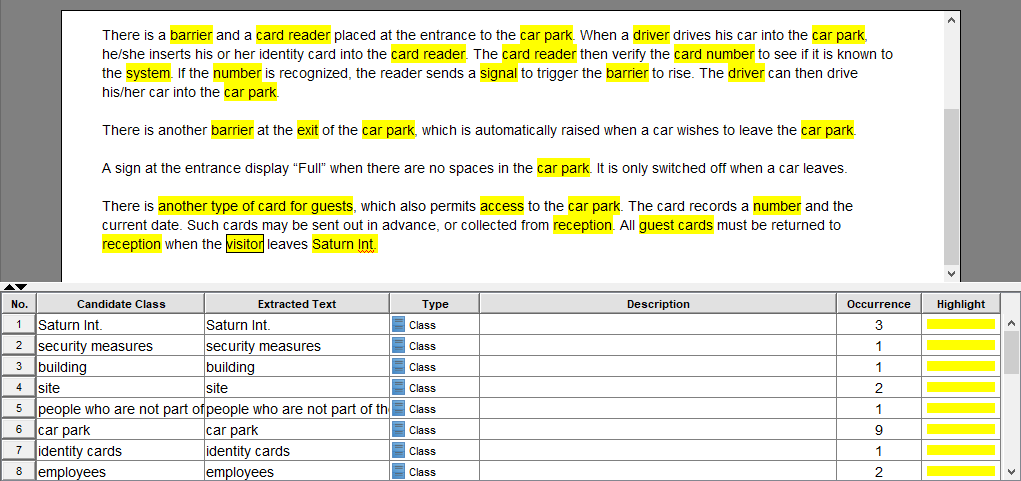
Up to now, the Textual Analysis editor should look like this:
Rejecting candidate objects
In this section, those candidate classes will be reviewed against a list of rejection rules. By the end of this section, a list of class models will be obtained.
Now, review the list of candidate classes against the rejection rules below:
- Duplicates: if two or more objects are simply different names for the same thing.
- Irrelevant: objects which exists in the problem domain, but which are not intended.
- Vague: when considering words carefully it sometimes becomes clear that they do not have a price meaning and cannot be the basis of a useful in the system.
- General: the meaning is too broad.
- Attributes: as the attribute of objects.
- Associations: actually represents the relationships between objects.
- Roles: sometimes objects referred to by the role they play in a particular part of the system.
The following table lists the result of reviewing:
| Candidate class |
Accept / Reject |
Reason of rejection |
| Saturn Int. management |
Reject |
Irrelevant to the system |
| Security measures |
Reject |
vague |
| Building |
Reject |
Irrelevant to the system |
| Site |
Reject |
Irrelevant to the system |
| People who are not part of the company |
Reject |
Irrelevant to the system |
| Car park |
Accept |
|
| Identity cards |
Accept |
|
| Employees |
Reject |
Duplicate with ‘Company staff’ |
| Name |
Reject |
Attribute |
| Department |
Reject |
Attribute |
| Number |
Reject |
Attribute |
| Company staff |
Reject |
Role |
| Access |
Accept |
|
| Barrier |
Accept |
|
| Card reader |
Accept |
|
| Driver |
Reject |
Role |
| Card number |
Reject |
Attribute |
| System |
Reject |
Too general |
| Signal |
Accept |
|
| Exit |
Reject |
Irrelevant to the system |
| Another type of card for guests |
Reject |
Duplicates with Guest cards |
| Reception |
Reject |
Irrelevant to the system |
| Guest cards |
Accept |
|
| visitor |
Reject |
Role |
To differentiate the accepted and rejected candidate classes, let’s change the highlight color to green for those accepted. To do this, click on the cell with yellow highlight and select green from the color picker.
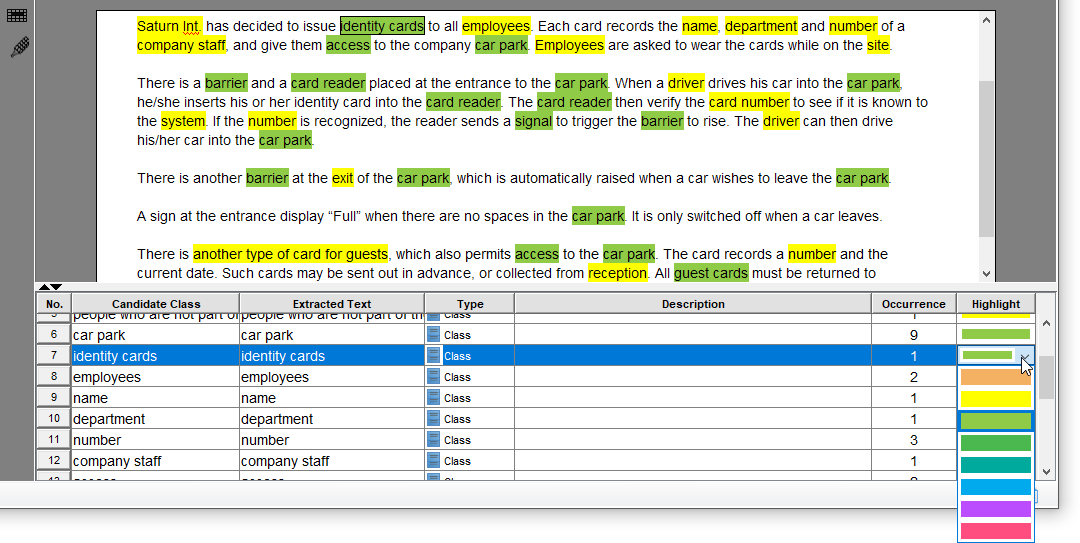
So now, the remaining list of candidate classes are obtained as following:
| Car park |
Identity cards |
Access |
Barrier |
| Card reader |
Signal |
Guest cards |
|
Rephrasing identified classes
Let’s rephrase the accepted candidates to: (1) Unify the noun form between the use of singular and plural and (2) Accurately reflect the meaning of the extracted text.
Read the table below for the changes needed and the explanation of changes.
| Extracted text |
Rephrase to |
Reason |
| car park |
|
|
| identity cards |
staff card |
“Identity cards” literally means all kinds of card, but according the passage the word “identity card” comes from the noun phrase “identity cards to all employees”, so it actually means staff card. We shall rephrase it to avoid confusion. |
| access |
|
|
| barrier |
|
|
| card reader |
|
|
| signal |
|
|
| exit |
|
|
| guest cards |
guest card |
Change to use singular noun to make it conform to the other words |
Update the name of the candidate classes accordingly:

Creating class model elements from text
You have identified a list of classes. To use them in model construction, you need to convert them from words into model elements.
- Select the seven classes in the table. To perform a multiple selection, keep pressing on the Ctrl key and click on the rows one by one.
- Right click on your selection and select Create Model Element from the popup menu.

- You are prompted to visualize the created elements in a diagram. Keep the option Create new diagram selected. Rename the class diagram to Car Park System and click Create.
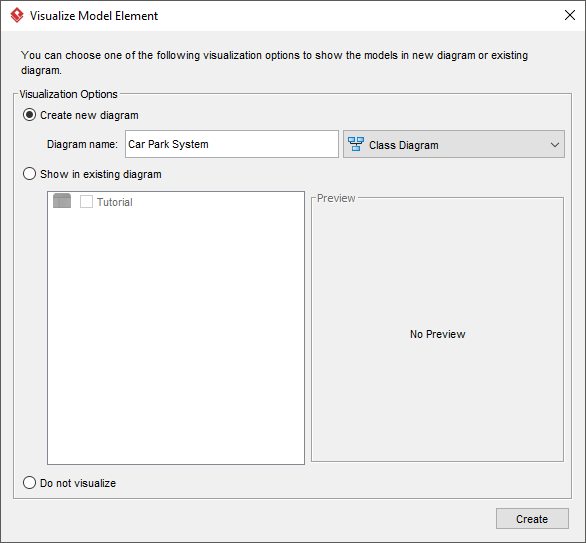
This creates a class diagram.
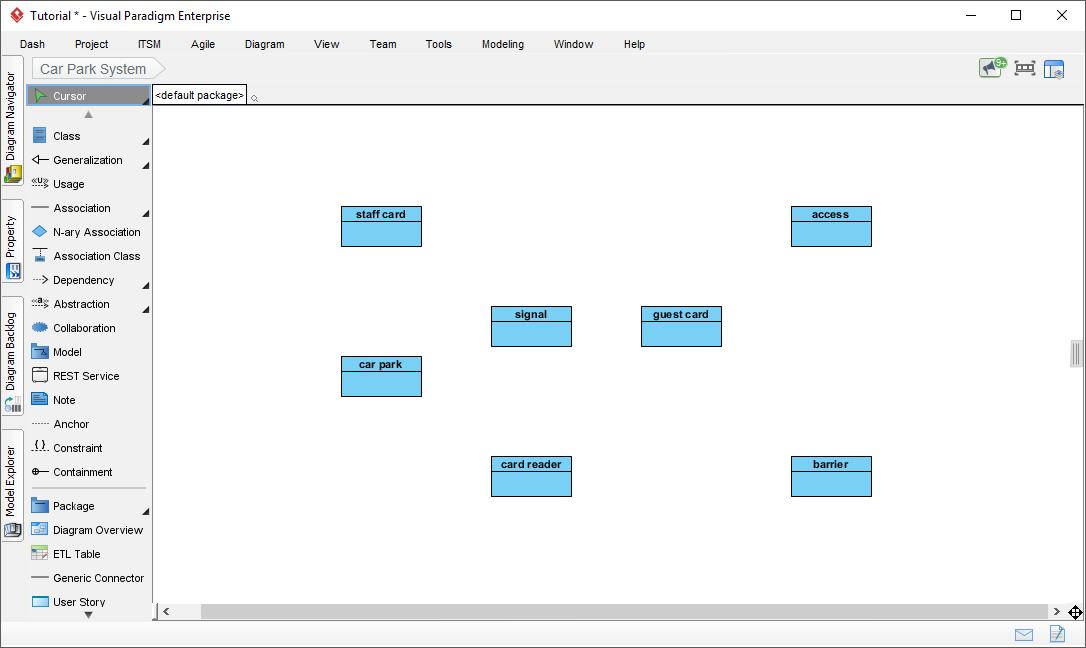
Developing Class Model – Identify structural relationships
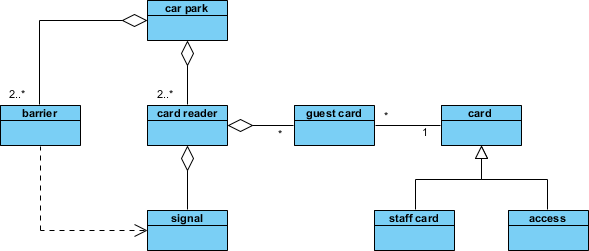
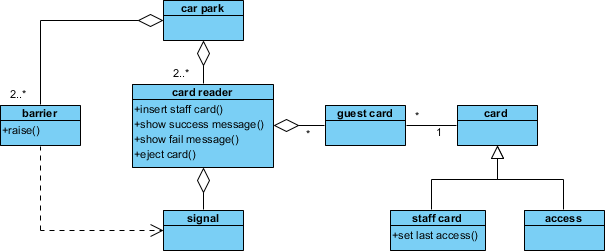
You’ve obtained a set of classes visualized in a class diagram. Now, identify their structural relationships by connecting them with relationship connectors like association, generalization and dependency. The figure below shows the result. During the process, new classes may be added, like the addition of class “card” in this example as a super class of the subclasses staff card and guest card.
Developing Interaction Model – Identify attributes and operations
Sequence diagrams are created to visualize the interactions between the objects i.e. the instances of those classes identified above. During this process, attributes and operations will be identified, which in turns make the class model complete. Let’s create a sequence diagram to visualize the case when a company staff drives his car into the car park.
- Create a Sequence Diagram. Select Diagram > New from the main menu.
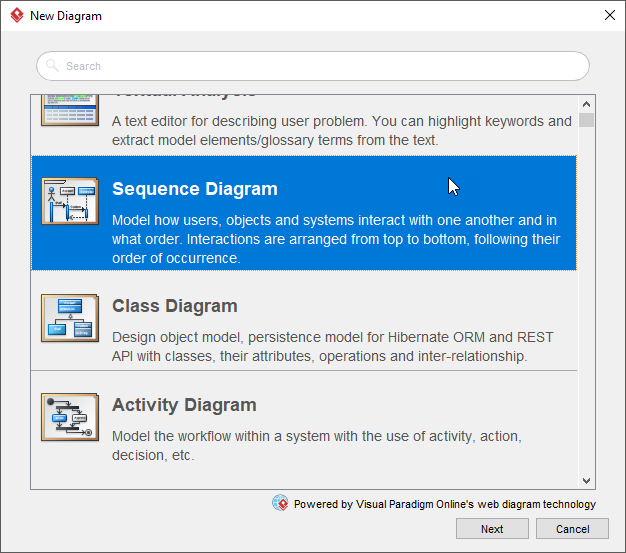
- In the New Diagram window, select Sequence Diagram and click Next. Select Blank as template and click Next. Enter Car parking (With staff card) as the diagram name and click OK.
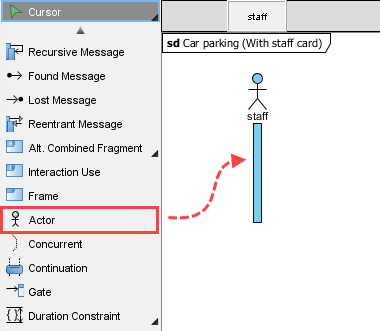
- The scenario starts from a driver who inserts his staff card into the card reader. Let’s create an actor Staff. To create an actor, select the Actor tool from the diagram toolbar and drag it onto the diagram.
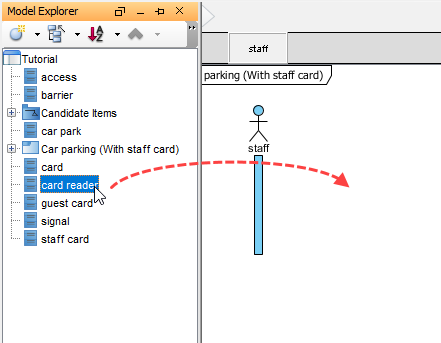
- We need to show card reader as an object. Instead of creating a lifeline, let’s create an object instance from the card reader class. There are several ways to achieve this. One of the ways is to reuse the class via the Model Explorer. Click on the Model Explorer tab attached to the left of the application window (or select View > Panes > Model Explorer if the tab doesn’t present). Then, drag the class card reader onto the diagram.
- Select LifeLine to create when you are prompted to choose a type.
- The lifeline is automatically named ‘card reader’, following the name of classifier. Since the name is optional, let’s remove it. This also makes the diagram easier to read.
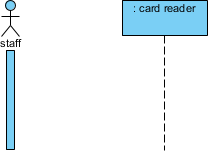
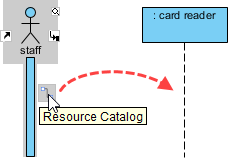
- Connect staff with : card reader. Move your mouse pointer over the actor staff. Press on the Resource Catalog button and drag it to the lifeline : card reader.
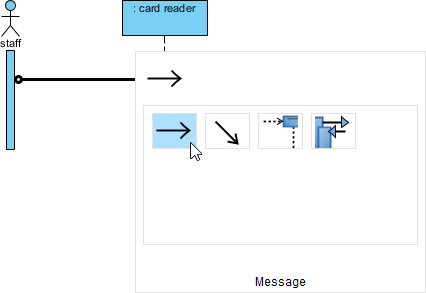
- Release your mouse pointer and select Message from Resource Catalog.
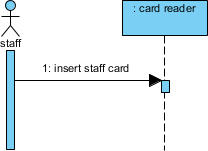
- Enter insert staff card to be the name of message.
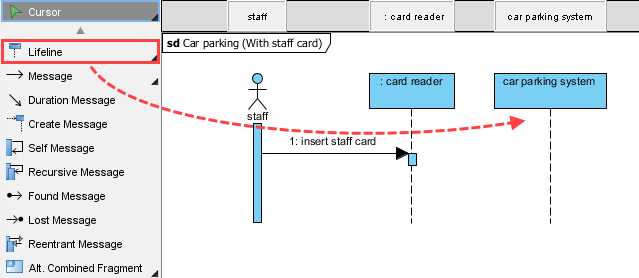
- As an input device, card reader receives the card and then request the system to verify it. Let’s create a lifeline for the system. Since we don’t have such a class, we just create the lifeline directly. Drag Lifeline from the diagram toolbar to the diagram. Name the lifeline car parking system.
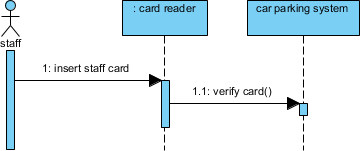
- Create a message verify card() from : card reader to car parking system.
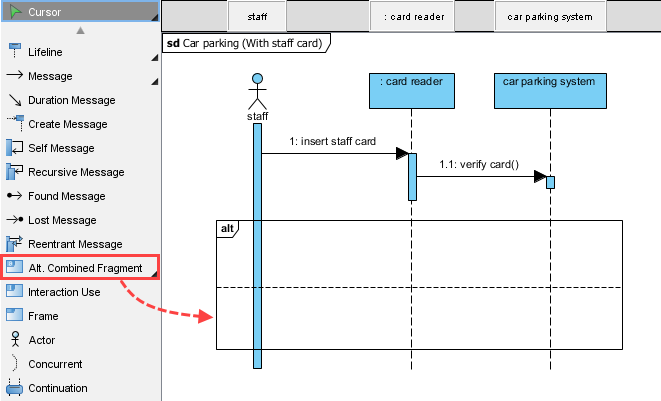
- There are two possible results: success or fail. We shall model both cases. In a UML sequence diagram, an alternative combined fragment can be used to model multiple possible flows. Create an alternative combined fragment that covers the actor and lifelines. We will resize it to cover more lifelines as more and more lifelines are added.
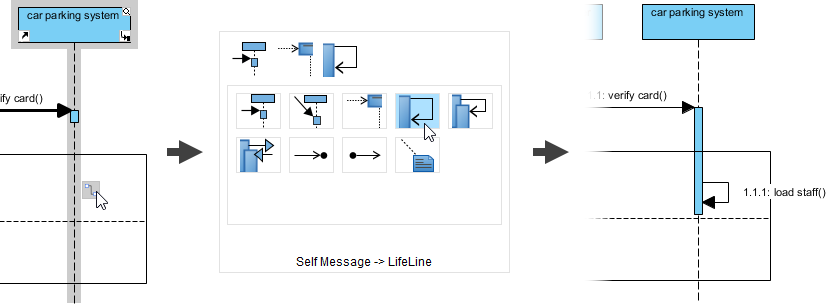
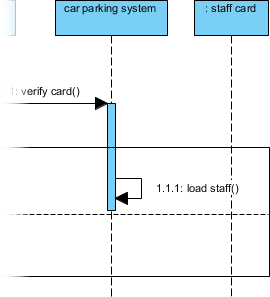
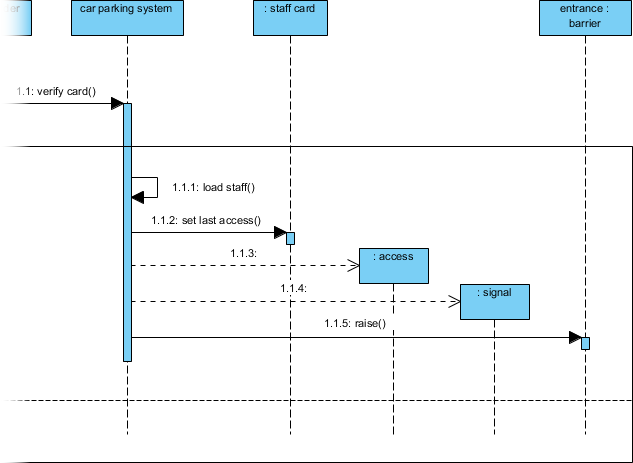
- If success, the system will load the record of staff card. Create a self-message load staff(). To do this, move your mouse pointer over car parking system and click on Resource Catalog, then select Self Message -> LifeLine from Resource Catalog. Enter the name of the self-message.
- Follow step 4 to visualize the class staff card as a lifeline. Again, remove its name.
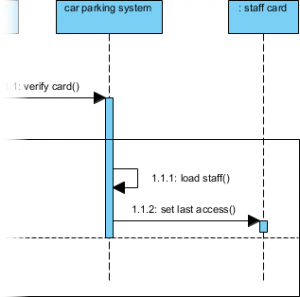
- Let’s say the last access time will be set to the record of staff card. Represent this by a set message set last access().
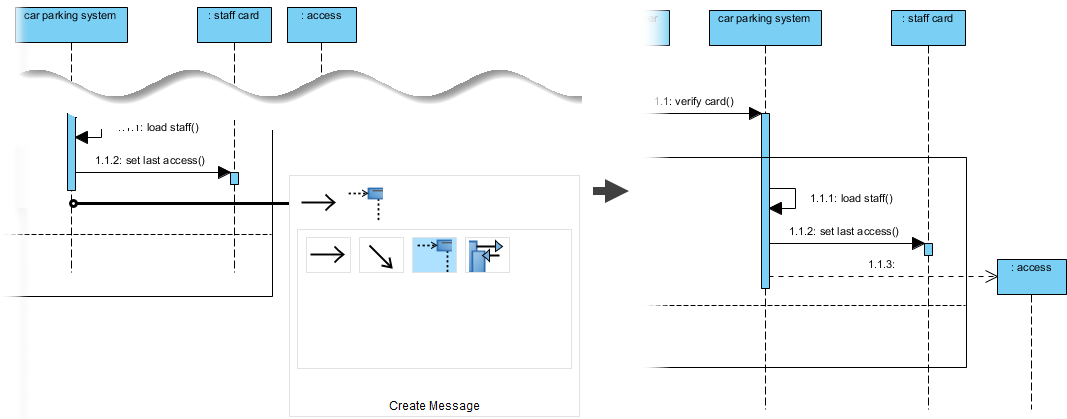
- A record of access would be created. Let’s visualize the access class on the diagram as a lifeline, and then connect to it with a create message. Don’t forget to enlarge the alternative combined fragment to cover the lifeline.
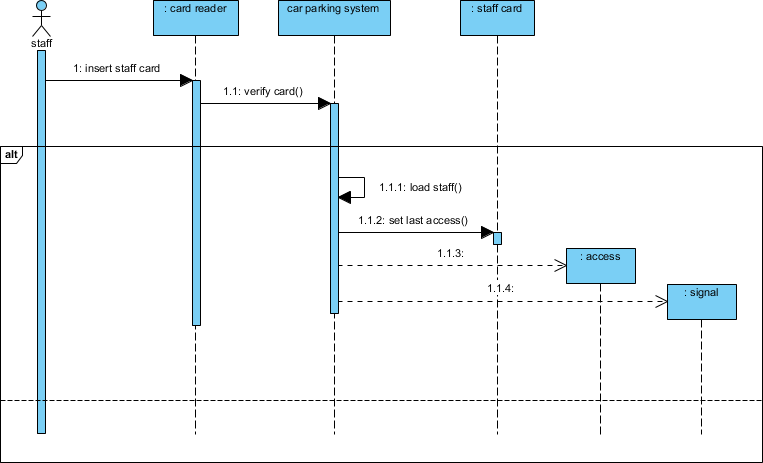
- A signal would also be created to trigger the barrier to raise. Let’s visualize the signal class on the diagram and then connect to it with a create message. Up to now, your sequence diagram should look similar to the figure below.
- Raise the barrier. Visualize the barrier class as a lifeline and connect to it with a raise() message. Here we name the lifeline entrance because there is a barrier in at both the entrance and exit while we are referring to the one at entrance in this diagram.
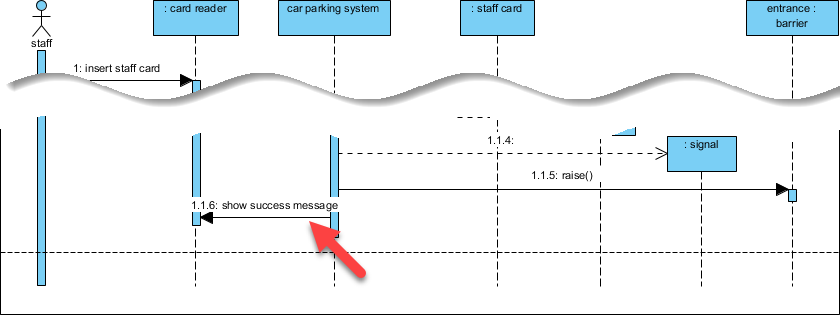
- Finally, request the card reader to show a message to indicate the success verification of staff card. Create a sequence message show success message that connects between car parking system and : card reader.
- What will happen when the card cannot be verified? Let’s model that at the lower part of the alt. combined fragment. Let’s say the system will request the card reader to show a verification fail message. Create such a message in the diagram.

- No matter success or fail, the staff card will be ejected after the verification process. Let’s create the sequence message eject card that connects the car parking system and the : card reader.

- Finally, create a return message card returned from : card reader to the actor staff. To do this, create the message, and then right click on it and select Type (Unspecified) > Reply from the popup menu.

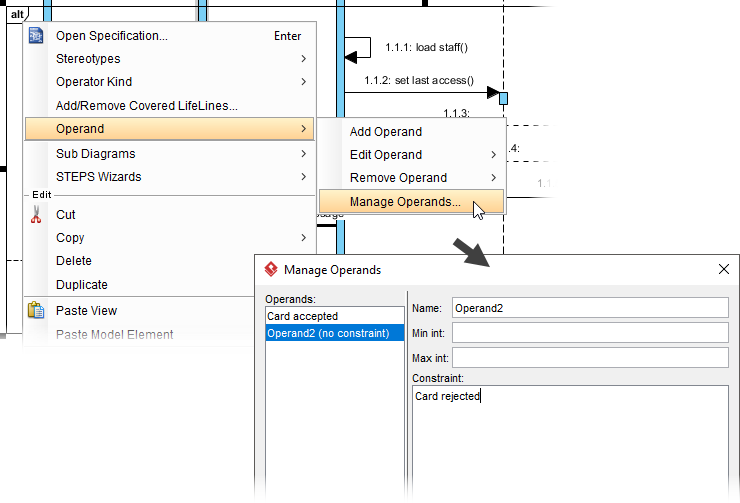
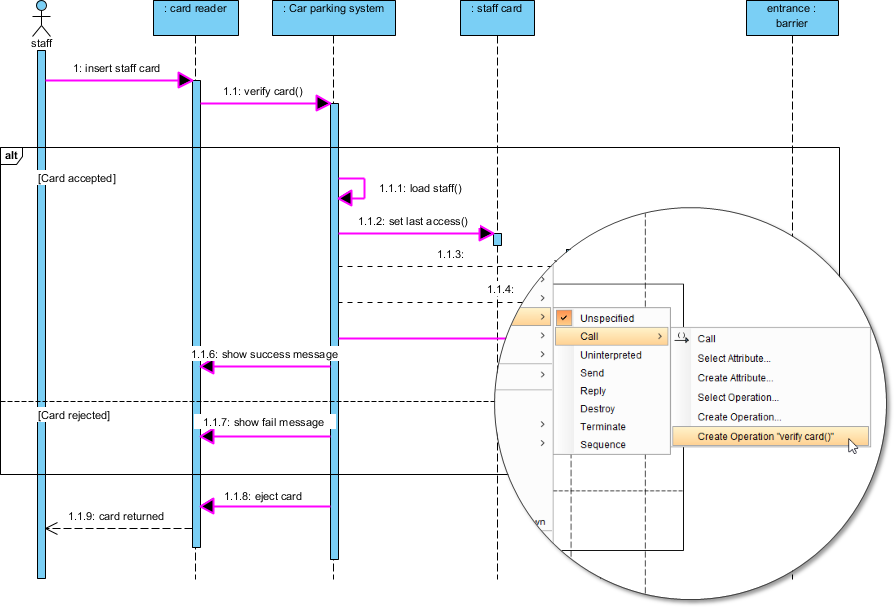
- The two compartments of the alt. combined fragment are known as operands. Enter the conditions of the operands as constraints. Right click the label alt at the top left of the combined fragment and select Operand > Manage Operands from the popup menu. In the popup window, set the constraint of the two operands as Card accepted and Card rejected respectively.
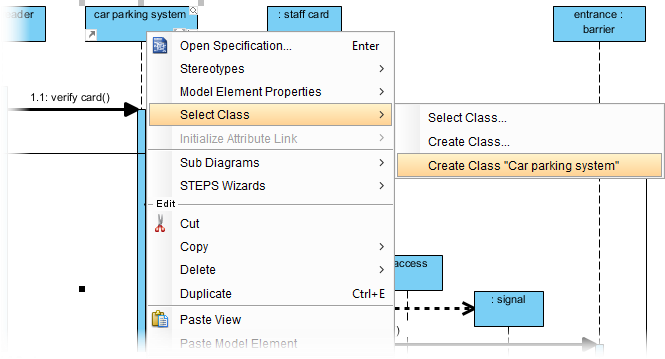
- Let’s create operations from the sequence messages. First, create a class from the lifeline car parking system. Right click on the lifeline and select Select Class > Create Class “car parking system” from the popup menu.
- Refer to the following image. For each of the highlighted connectors, right click on it and select Type > Call > Create Operation from the popup menu.
- Go back to the class diagram. Operations are automatically presented in the class model.
By creating more and more sequence diagrams for different scenarios, the class model will be gradually enriched by including all the operations and attributes the system needs.
