What is UML Stereotype? How to Define it?
Stereotypes is extensibility mechanisms in UML which allows designers to extend the vocabulary of UML in order to create new model elements. By applying appropriate stereotypes in your model you can make the specification model comprehensible.

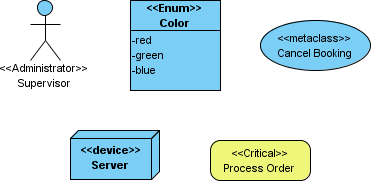
A stereotyped model type can appear many times within a project. For example, when modeling an online shopping system with a use case diagram, you might have multiple actors who are <<administrator>>. The same applies to class models, where you might have multiple <<Enum>> or <<Model>> classes. When a stereotyped model type is used so frequently that it becomes a primitive building block in a model, allowing direct creation saves time by avoiding repeated redefinition. This article demonstrates how to configure the diagram toolbar to easily create a stereotyped model element.
Configuring the Diagram Toolbar
- Right-click on the diagram toolbar of the opening diagram and select Configure Buttons from the popup menu.

- In the Configure Buttons window, expand the tree node of the desired model element type.

- Click > to add the stereotype(s) to the selection.

- Now, you can create the selected type(s) of class via the diagram toolbar. To do this, click the element type button in the diagram toolbar and select the chosen element type from the popup menu.

- Click on the diagram to create such an element.

Auxiliary Options
There are auxiliary options for rearranging items in the diagram toolbar to make selection easier. We will go through two of them.
Show Name displays button names when enabled. Turning it off can reduce the space consumed by the buttons.

Expand Group expands all collapsed groups so that all stereotyped model types are visible and ready for direct selection.
